This is a VERY general “HOW TO” for labels. If you want more a more detailed “HOW TO”, follow this link to our YouTube channel.
YouTube video: https://www.youtube.com/watch?v=qWFhG393KSs
FROM THE MAIN MENU OF THE PHARMACY MANAGEMENT SYSTEM
3- UTILITY PROGRAMS
1- UTILITIES MENU #2
6- LABEL FORMATS MENU
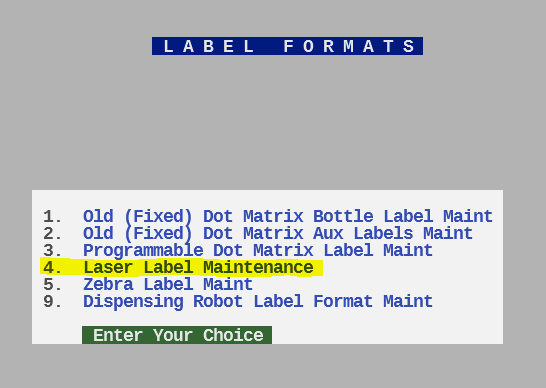
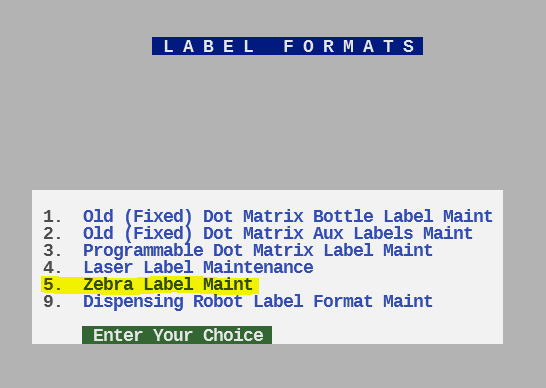
The previous keystrokes will bring you to this screen

Once you have reached the screen above, you need to select what type of label you are using. The two main types of labels are 4. LASER (left) and 5. ZEBRA (right).
LASER LABEL FORMAT ZEBRA LABEL FORMAT
After you have made the appropriate selection, you will come to a screen that looks like this. (LASER Label (left), ZEBRA Label (right)
LASER LABEL FORMAT ZEBRA LABEL FORMAT
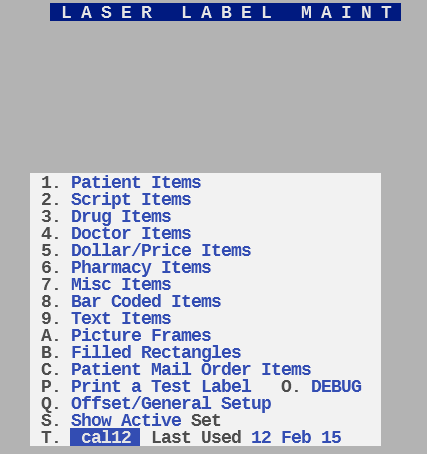
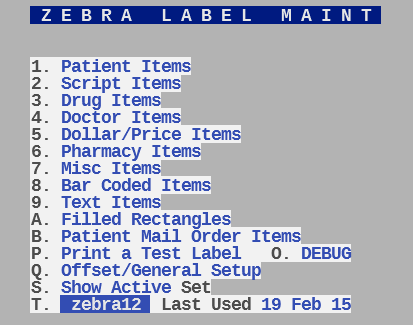
A. Picture Frames- This menu option is used to print picture frames on the label sheet. Picture frames are used to accentuate specific pieces of information on the label.
B. Patient Mail Order Items- This menu is used to print the patients mail order information on the label sheet.
P. Print a Test Label- This function will print a test label with the current settings.
O. Debug- This is a tool to help you identify what items are printing and their printing location.
Q. Offset/ General Setup- Use this menu to enter in the minimum point size for the directions to shrink to. Also use this menu to program an entire label offset value.
S. Show Active- Pressing this option will cause “Act” to display to the right of each option that currently has a valid setting for the label.
T. (current label format)- This menu will show you what label format you are currently using. If you select this menu it will show you all of your label formats. THIS IS NOT THE PLACE TO CHANGE YOUR LABEL FORMAT, that should be done in the terminal map.
If you have any additional questions or need assistance, feel free to call our support office 1-(801)-785-7720.